How to Back Up WordPress with ManageWP
ManageWP allows you to back up all of your WordPress apps, no matter what server they are on.
Setting Up Your Account
When you log in to ManageWP for the first time, you'll be prompted to introduce yourself by entering your first and last name.
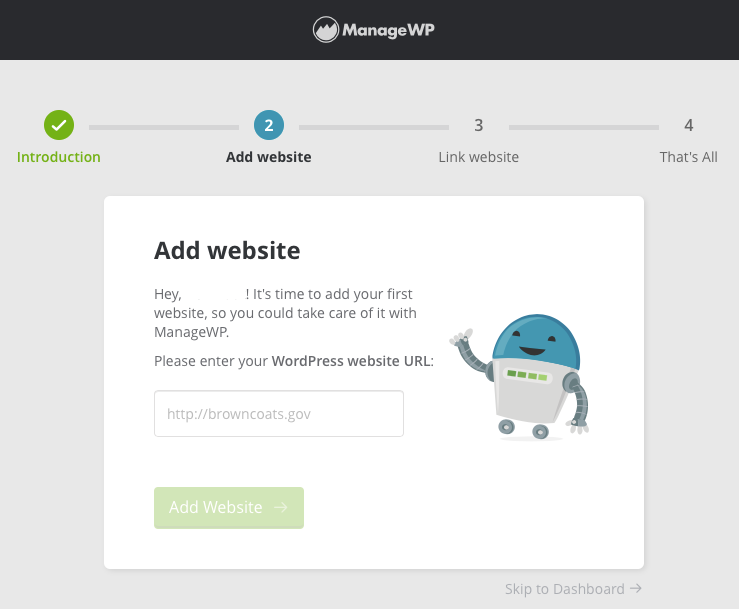
Then, you'll add your first website.
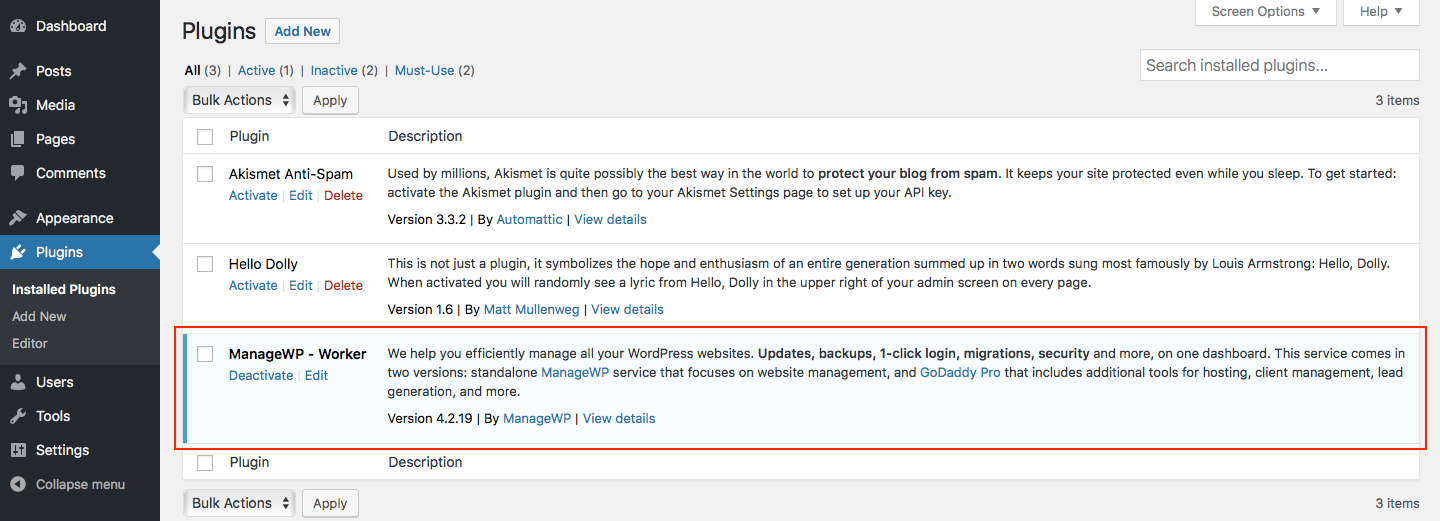
Next, ManageWP will offer to automatically install its Worker plugin to your site and will ask for the credentials for your WordPress admin account. Enter them and click Install Plugin.

Log in to your WordPress Dashboard, and you'll see the ManageWP Worker plugin has been installed.
Backing Up Your Site
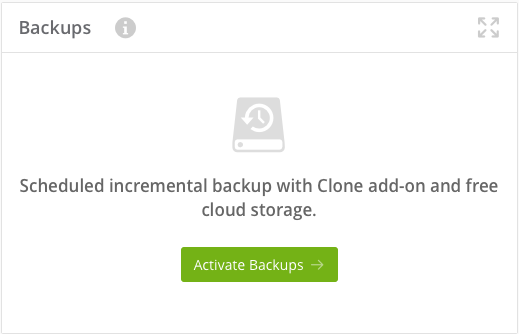
Now, navigate back to your ManageWP Dashboard and click Activate Backups.
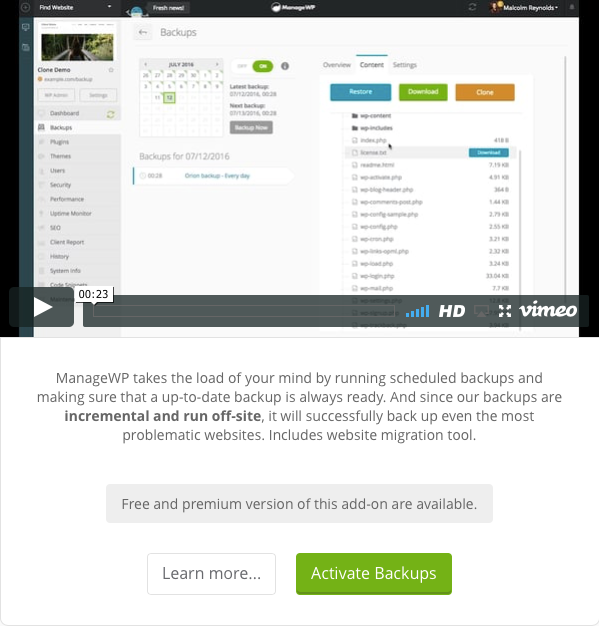
On the next screen, you can watch a video explaining ManageWP's backup features. When it has finished, click Activate Backups.
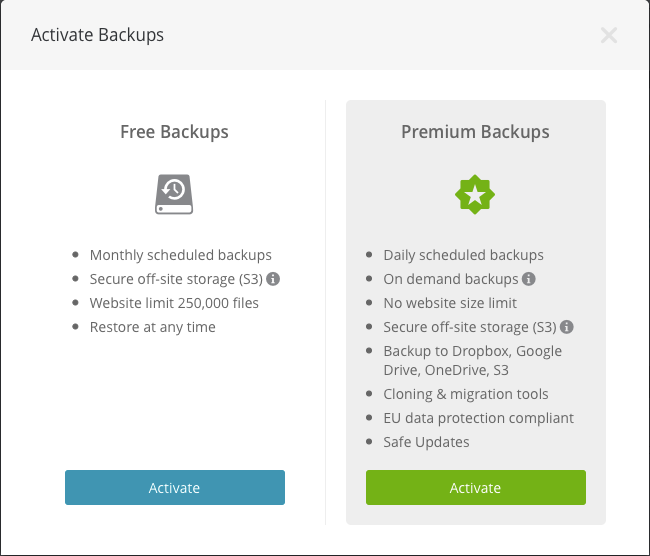
ManageWP offers two plans for backups. Select the option that best suits your needs (we'll be using free backups in this tutorial).
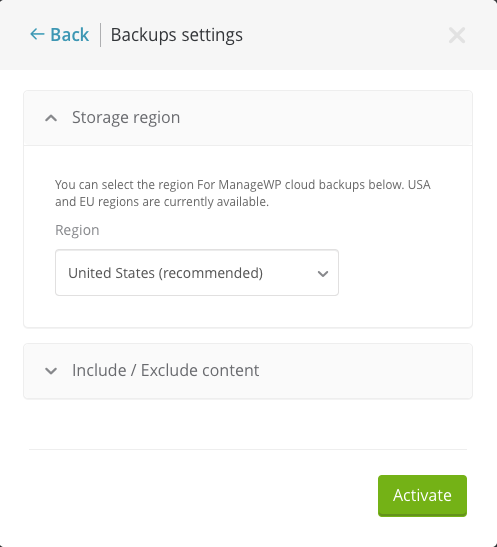
After selecting free backups, you'll be prompted to select your storage region and to elect whether to exclude content from your backup. Make your selections and click Activate.
Your backup will begin processing.
Restoring Your Site
After your first task has run, you'll be able to restore your site from a backup.
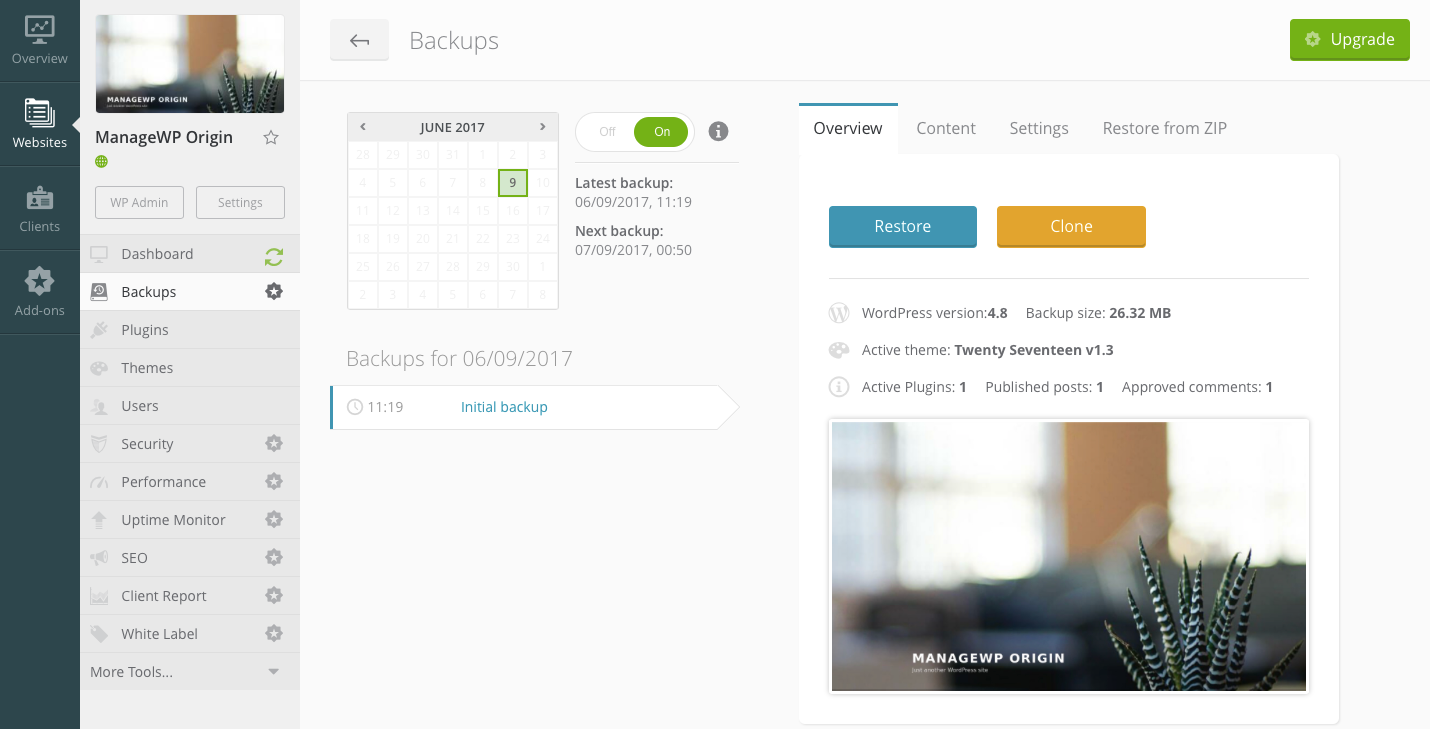
First, open the Backups panel in your ManageWP Dashboard. Select the date of the backup you wish to restore and click Restore located beneath the Overview tab.
Confirm by clicking Restore once more.
When the restoration has successfully completed, visit your site to make sure everything is at it should be.