How to Install Craft CMS
Craft is a content management system created for PHP developers who have a lot of experience with coding and want more flexibility than WordPress.
You can install Craft CMS on your server with DigitalOcean, Rackspace, or Linode using SFTP after you have connected your server to ServerPilot.
Customize MySQL 5.7 for Craft 2
Craft 2 does not work with the default settings of MySQL 5.7, which is the version running on Ubuntu 16.04 and 18.04. To use Craft 2 on Ubuntu 16.04 or 18.04, you must customize MySQL on your server by following these instructions.
SSH in to your server as root and create this file:
/etc/mysql/conf.d/sql_mode.cnf
Open the file and enter these two lines:
[mysqld]
sql_mode=STRICT_TRANS_TABLES,NO_ZERO_IN_DATE,NO_ZERO_DATE,ERROR_FOR_DIVISION_BY_ZERO,NO_AUTO_CREATE_USER,NO_ENGINE_SUBSTITUTION
Restart MySQL with this command:
sudo service mysql restart
Creating an App in ServerPilot
First, click Create App in ServerPilot; this can be done immediately after connecting a server or by going to the Apps page.
Give your app a name and select the server you want this app to be on (probably the one you just set up).
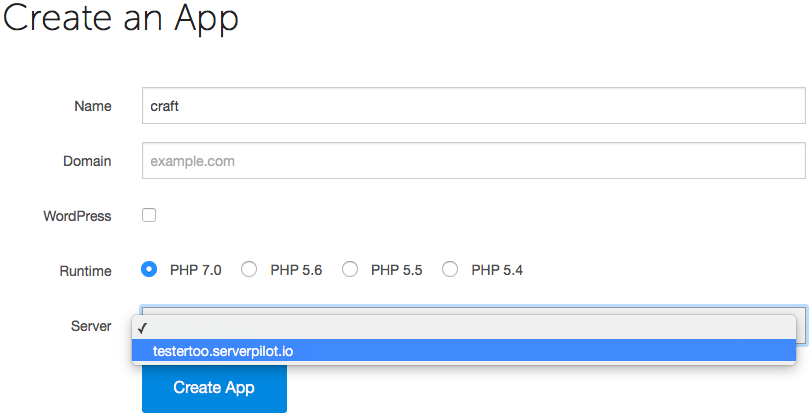
You may also select the system user you want to run this app.
Click Create App to submit the form. You'll be shown some details about the app.
Creating a Database
Craft CMS requires a MySQL database before you can run its installer, so we'll create one now.
Open your Craft CMS app's Databases tab in ServerPilot and click Create Database.
Choose a database name. A database username and password will be generated for you. Write these down, so you can enter them when the Craft CMS installer asks. Then, submit the form in ServerPilot to create the database.
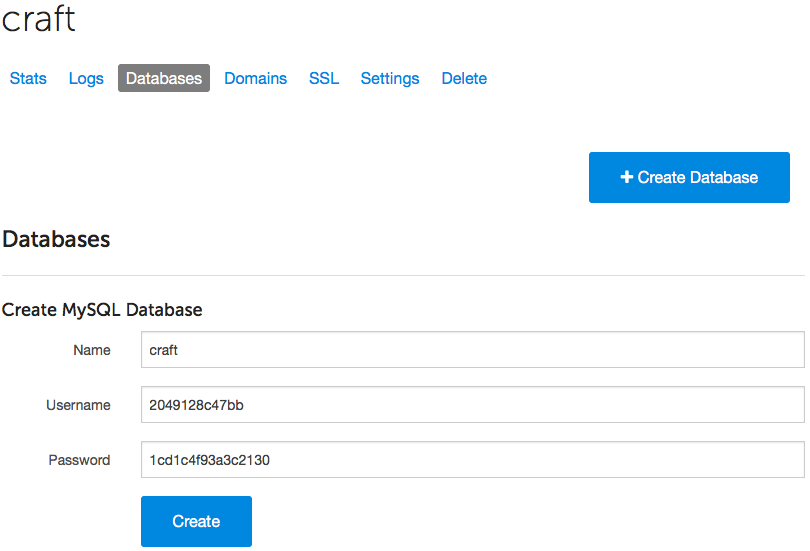
If you forget to write down the database password and need to reset it, just click on the database user in ServerPilot to see the change password form.
Installing Craft CMS
Now, it's time to install Craft CMS on your server.
Visit https://craftcms.com. Click Download and agree to the terms and conditions.

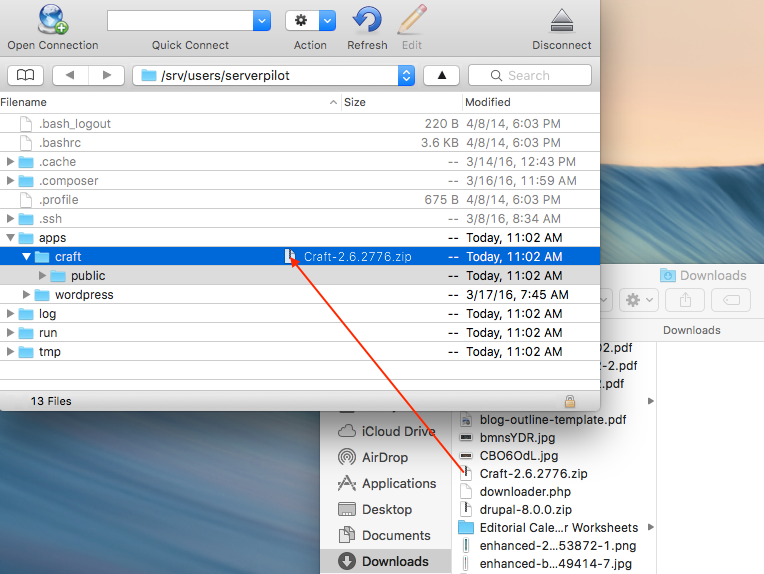
Now, log in to your server through Cyberduck (or your preferred SFTP client) with the system user the app belongs to and the password you chose for that system user.
Follow this path to your app directory, where APPNAME is the name of your app (we use craft in this tutorial):
apps/APPNAME
Drag the Craft CMS .zip file from your computer's Downloads folder and drop it into your app directory in Cyberduck.
Next, delete the public folder that currently resides in your app directory.
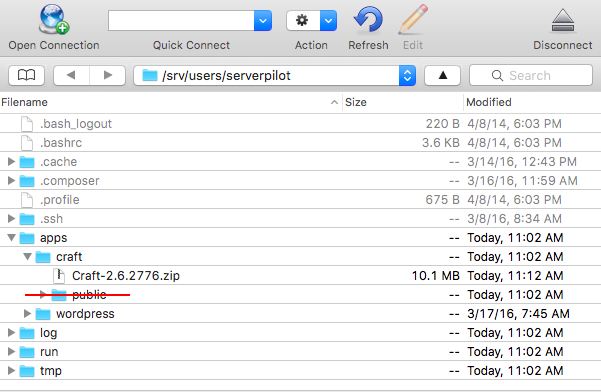
Then, click once on the Craft CMS .zip file and select Expand Archive from the Cyberduck File menu. Expanding the archive will create two new subdirectories: craft and public.
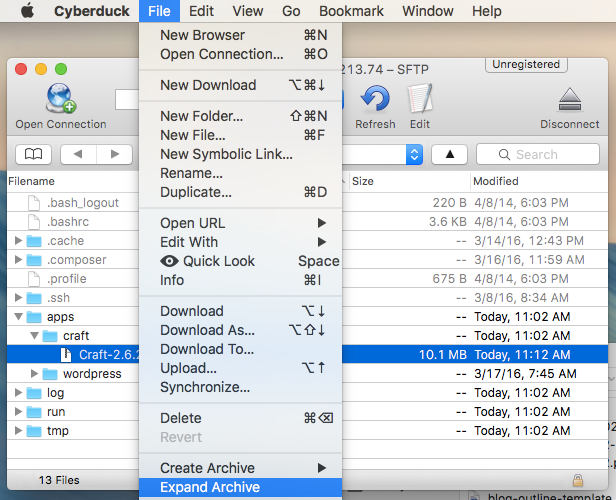
When the file has decompressed, delete the .zip file.
Now, edit your app's db.php file located at the following path:
apps/APPNAME/craft/config/db.php
In the appropriate fields, enter the database name, username, and password you created for your app in ServerPilot.

In your browser, visit http://YOUR-IP-ADDRESS-OR-DOMAIN/index.php/admin/install, substituting your IP address or domain (if you have configured DNS). You should see the screen to begin the Craft CMS installer.

Follow the on-screen prompts to finish the installation.
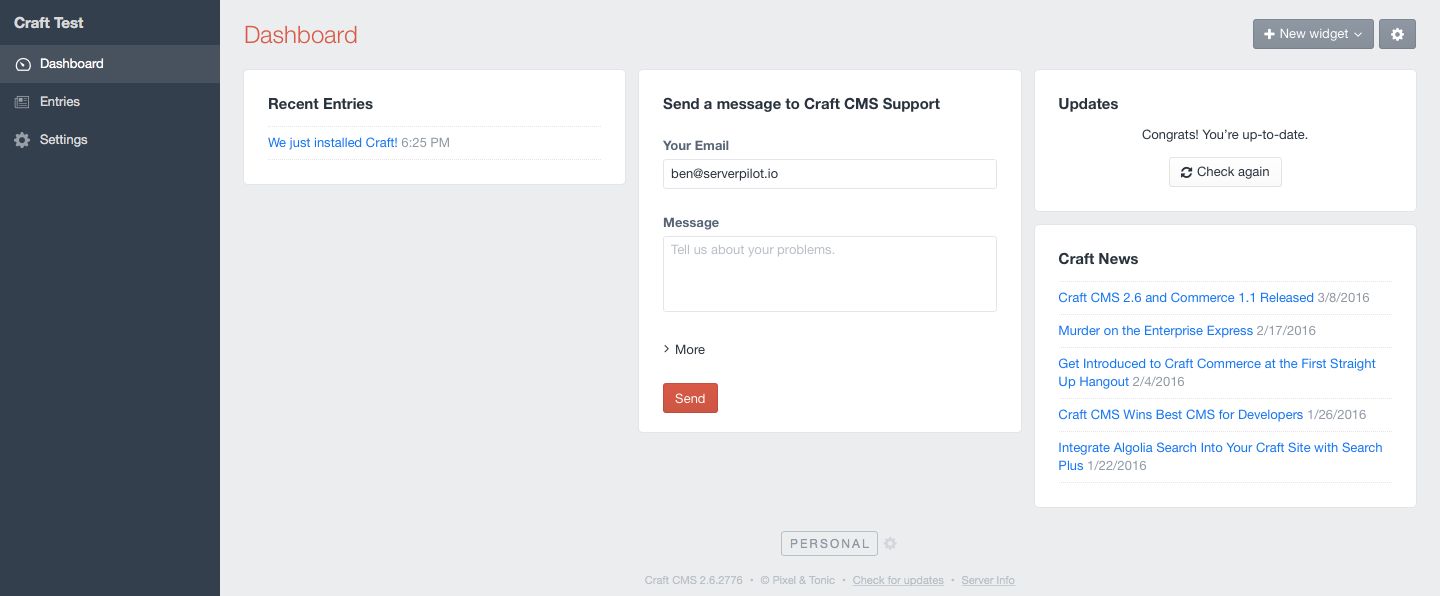
That's It
Once the installation is complete, you'll be sent to your new Craft CMS dashboard.
You can now use ServerPilot to deploy AutoSSL while ServerPilot works to keep your server's system packages updated with security updates.