How to Configure DNS on Linode
If you have a server on Linode, you'll likely want to configure DNS for your domains on Linode.
Create Your A Records
First, sign in to your Linode account and click the DNS Manager tab. Then, click Add a Domain Zone at the lower-right corner of the screen.
Enter your registered domain and an administrator email address (this address does not have to be associated with the domain).
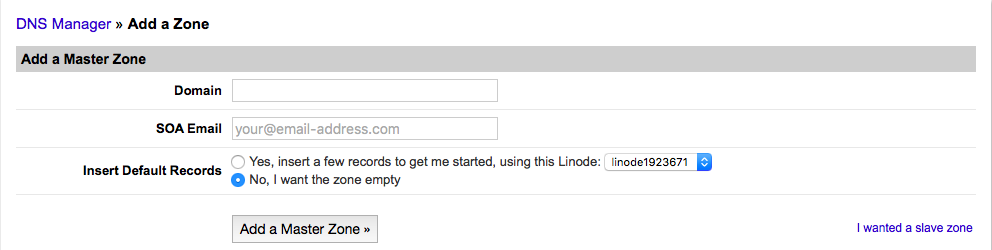
Select No, I want the zone empty, and click Add a Master Zone.
Lionde will show you a list of name servers (NS records) that you will need to give your domain's registrar. Refer to your registrar's documentation for instructions on setting your NS records.

Scroll down and click Add a new A record under the A Records section.

Enter your domain for the Hostname followed by your server's IP address. Leave the TTL set to default and click Save Changes.
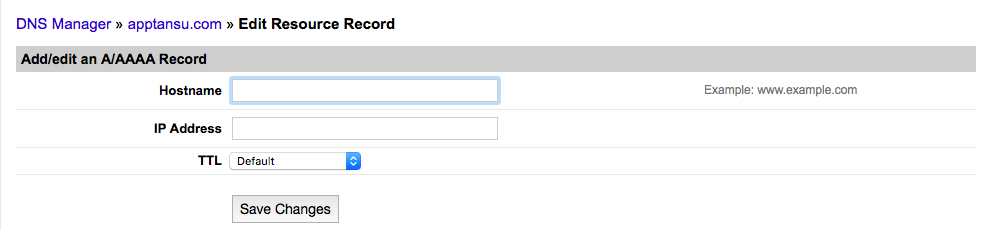
Repeat these steps to create an A record for your domain both with and without www and for each of your subdomains.
Create Your MX Records
You can also set up your MX, or mail exchange, records on Linode. This is important if you receive email for any addresses at your domain.
Return to your domain's Master Zone page and click Add a new MX record under the MX records section.

Here, you will need to manually insert the MX records given to you by your mail server.
In the first field, enter the destination value given by your mail server. Change the priority and TTL to your mail server's recommendations for that value.
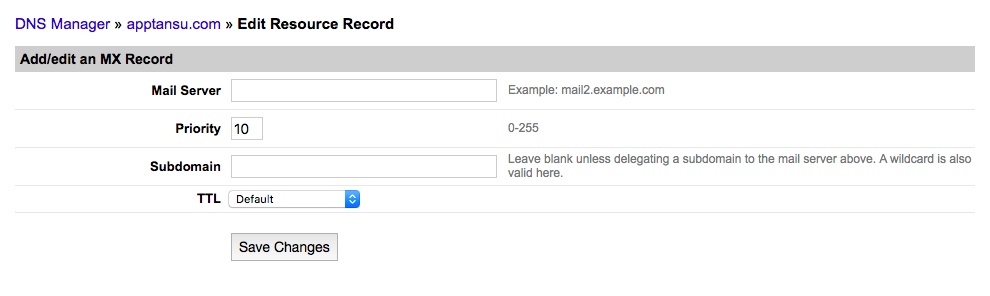
Leave the subdomain blank unless you are delegating a subdomain to your mail server.
Click Save Changes and repeat these steps for each of your MX records.
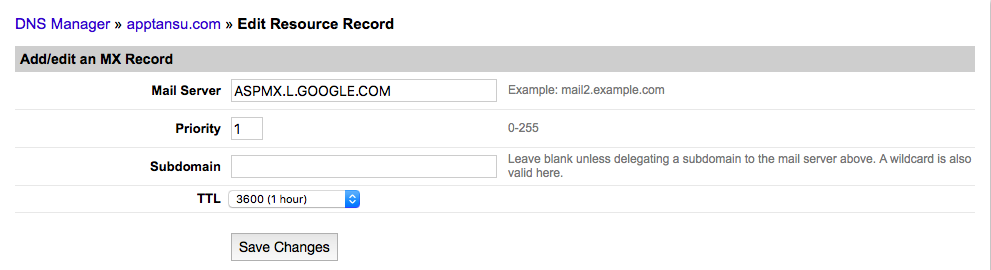
Let's take Google Apps' MX record values as an example.
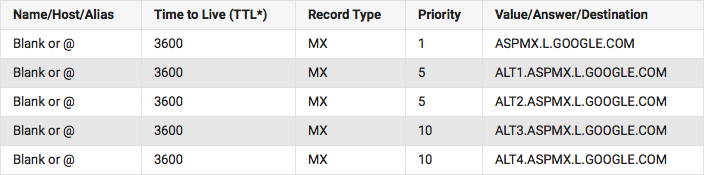
You would enter the first value into Linode as shown below.
That's It!
You've set up DNS on Linode. Again, be sure to give your registrar your new NS records and enter your domains in ServerPilot.