How to Configure DNS on DigitalOcean
Once you have created a server on DigitalOcean, you'll likely want to configure DNS for your domains at DigitalOcean.
Create Your A Records
First, sign in to your DigitalOcean account and click Networking at the top of the page. Then, click Domains at the left side of the screen.
Enter your registered domain and enter your IP address (or choose your Droplet from the autofill list that appears).
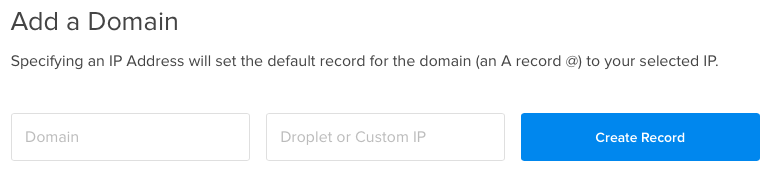
Click Create Record.
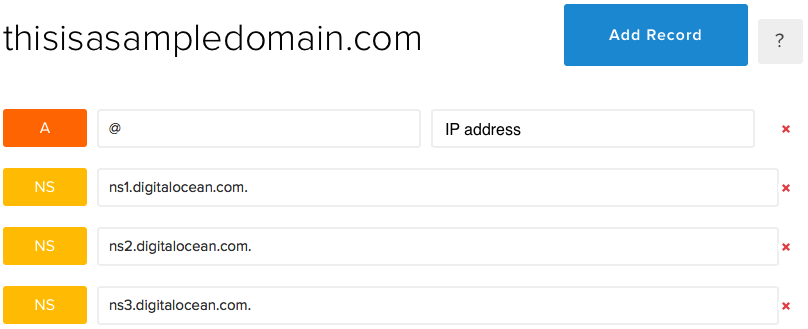
DigitalOcean will show you the A record, or address record, for your domain and the name servers (NS records) that you will need to give your domain's registrar.
Now, click Add Record and click A to add another A record. This time enter www in the first box and your IP address in the second. Click Create.
Your second A record will be added.
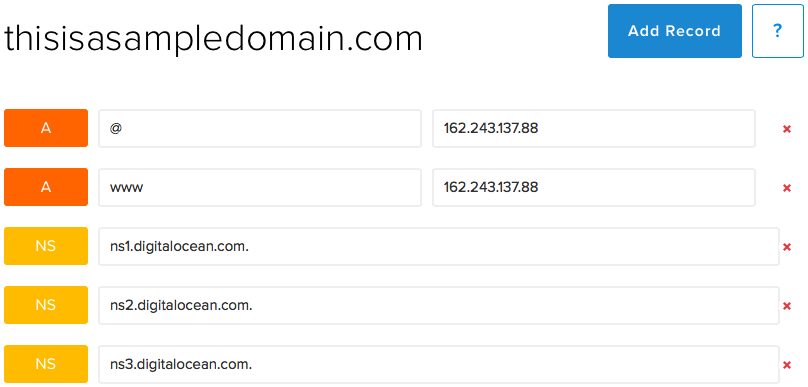
Continue creating A records for any subdomains that will be hosted on this server.
Create Your MX Records
You can also set up your MX, or mail exchange, records in DigitalOcean. This is important if you receive email for any addresses at your domain.
DigitalOcean simplifies this process if you are using Google Apps to host your email.
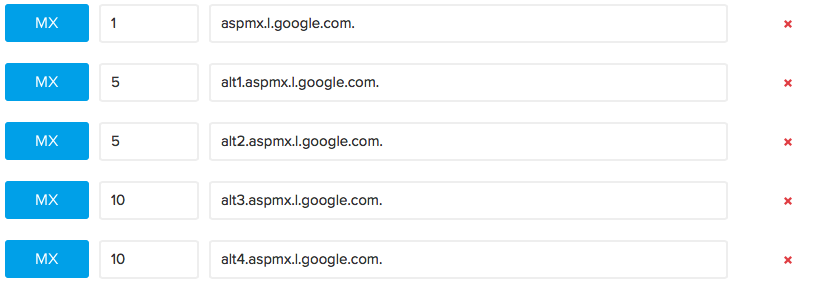
First, click MX under Select Record Type. Then, click Add Gmail MX Records.
DigitalOcean will add Gmail's MX records to your DNS entry.
If you have your email hosted with another service, you will need to manually insert the MX records given to you by that provider.
That's It!
You've set up DNS on DigitalOcean. Be sure to give your registrar your new NS records.