How to Switch Old DigitalOcean Servers to New Kernel Management
Before Ubuntu 16.04 was released, DigitalOcean required the server's kernel version to be configured through the DigitalOcean control panel. In other words, with Ubuntu 12.04 and Ubuntu 14.04 servers at DigitalOcean, the operating system could not choose a new kernel on its own. This means kernel updates cannot be applied simply by rebooting.
Starting with Ubuntu 16.04, DigitalOcean began configuring servers to use the standard behavior of letting the operating system choose its own kernel.
DigitalOcean then added the ability to switch Ubuntu 12.04 and 14.04 servers to the new, simpler kernel management.
How to Determine the Type of Kernel Management
If your server was an Ubuntu 16.04 or 18.04 server when you created it, you do not need to do anything. All servers created as Ubuntu 16.04 or 18.04 servers use the new kernel management.
If your server was an Ubuntu 12.04 or Ubuntu 14.04 server when you created it, you can log in to DigitalOcean's control panel to switch your server to the new kernel management.
Switching to the New Kernel Management
To switch a server to the new kernel management, log in to the DigitalOcean control panel.
Next, select the name of your droplet from the Droplets list, and then click Kernel.
If you see this message: "The kernel for this droplet is internally managed and cannot be changed from the control panel," there's nothing you need to do. Your server is already using the operating system's own kernel management. You're done!

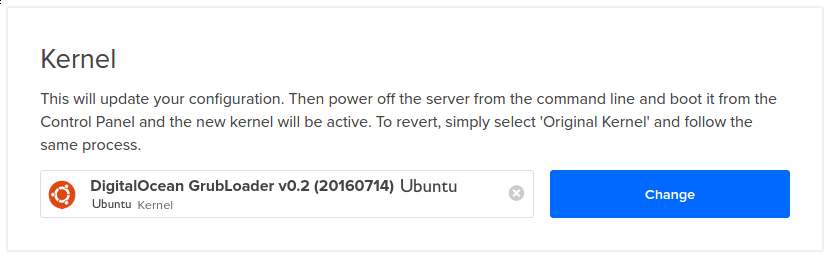
If instead your server shows a box for selecting a kernel, select "DigitalOcean GrubLoader 0.2 Ubuntu" and click Change.
Next, SSH in to your server to shut down your server. (It is very important to do this through SSH. It will not work to just power cycle your server from the DigitalOcean control panel.)
To shut down your server, SSH in to your server as root and run the following command:
sudo poweroff
Now, wait two to three minutes for your server to completely shut down.
Once your droplet shuts down, go to your droplet's Power page in the DigitalOcean control panel. Wait until the page says your server is powered off (that is, refresh the page until it says your droplet is powered off).
When your server has fully powered off, a button will appear that reads "Power On." Click Power On.
When your server comes back online, it will be using internal kernel management like newer DigitalOcean servers do. This means your server will now be using the latest, updated kernel.