How to Manually Install WordPress on DigitalOcean
If you do not want to use ServerPilot's one-click WordPress installer, this tutorial will show you how to use ServerPilot to install WordPress on your server through SFTP (assuming you have connected your server to ServerPilot).
Creating an App in ServerPilot
An app is a web application, such as WordPress.
In ServerPilot, click Create App; this can be done immediately after connecting a server or by going to the Apps page.
Give your app a name and enter your site's domain if you have one. Select the PHP version and the server you want this app to be on (probably the one you just set up). You may also select the system user you want to run this app.
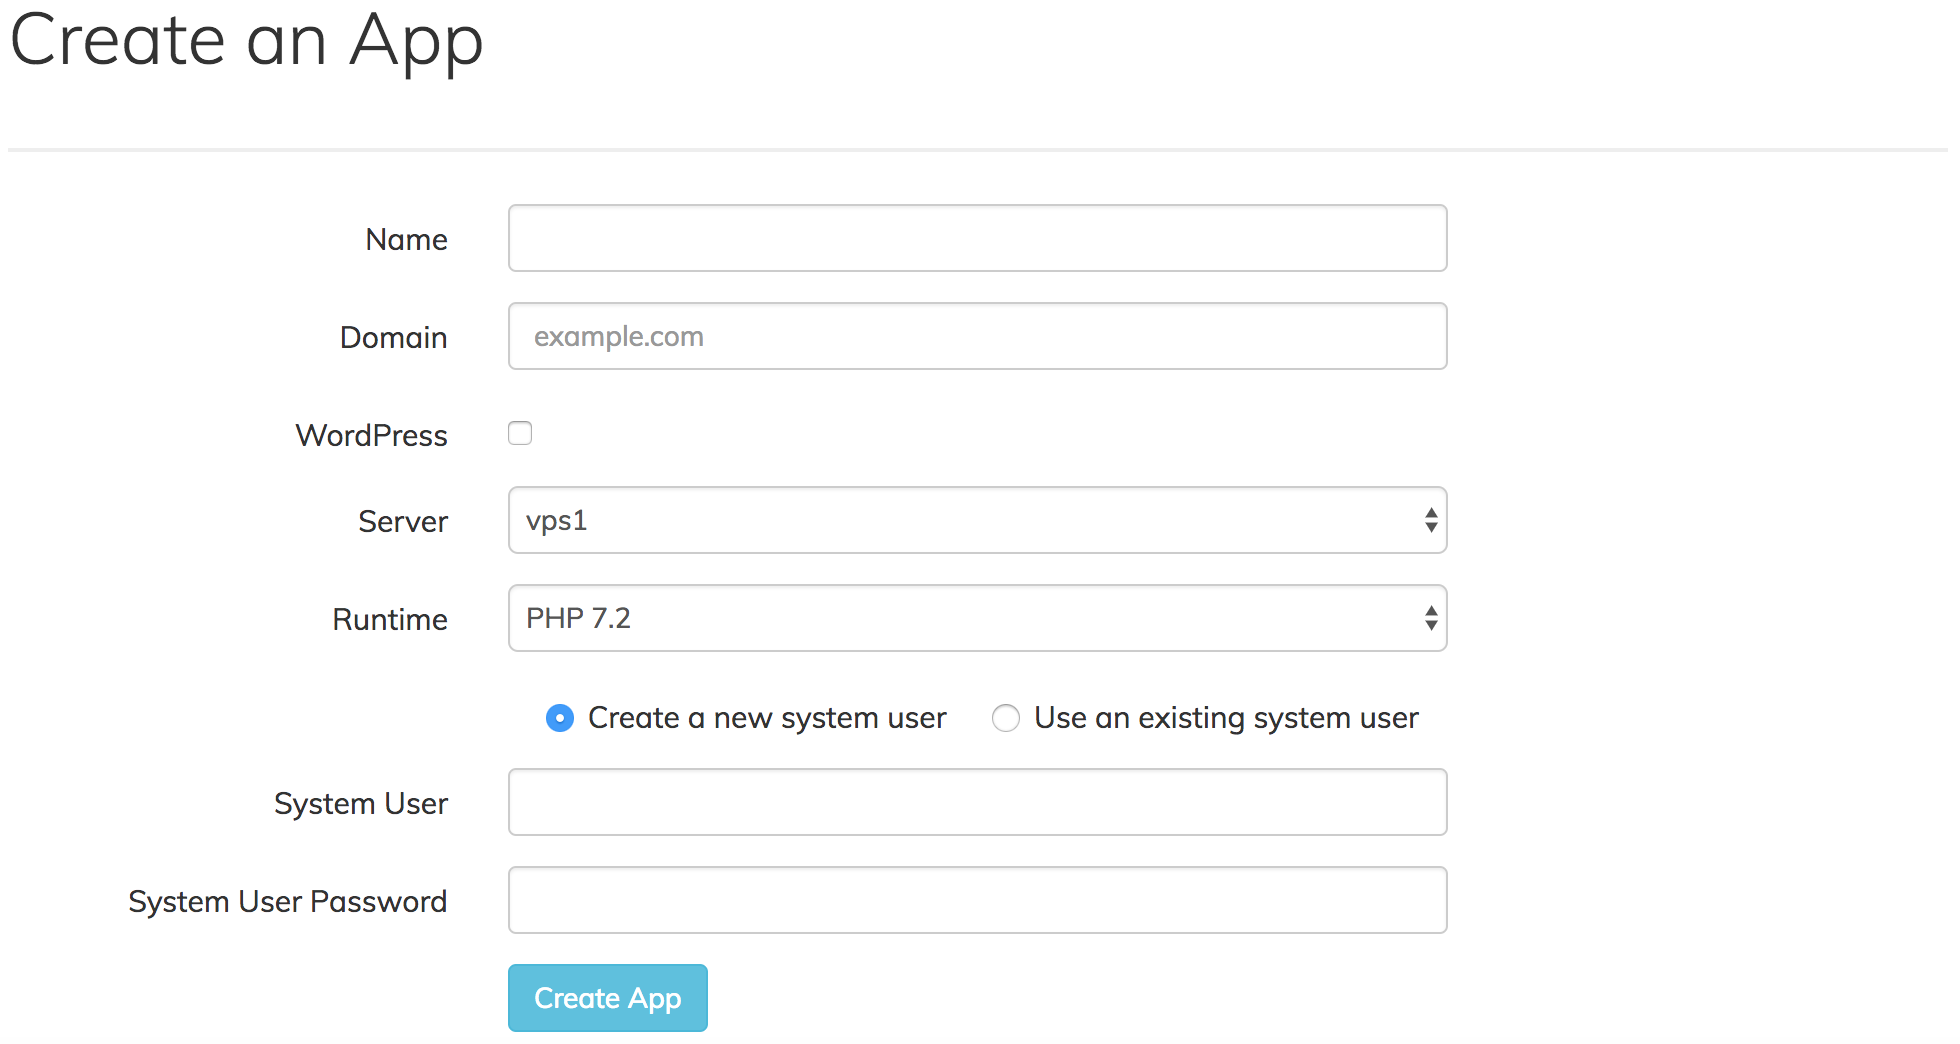
If you are not using the one-click WordPress installer, do not place a check mark next to WordPress.
Click Create App to submit the form. You'll be shown some details about the app.
Installing WordPress through SFTP
Open a new tab in your browser and visit https://wordpress.org. Click Download WordPress at the top of the page.
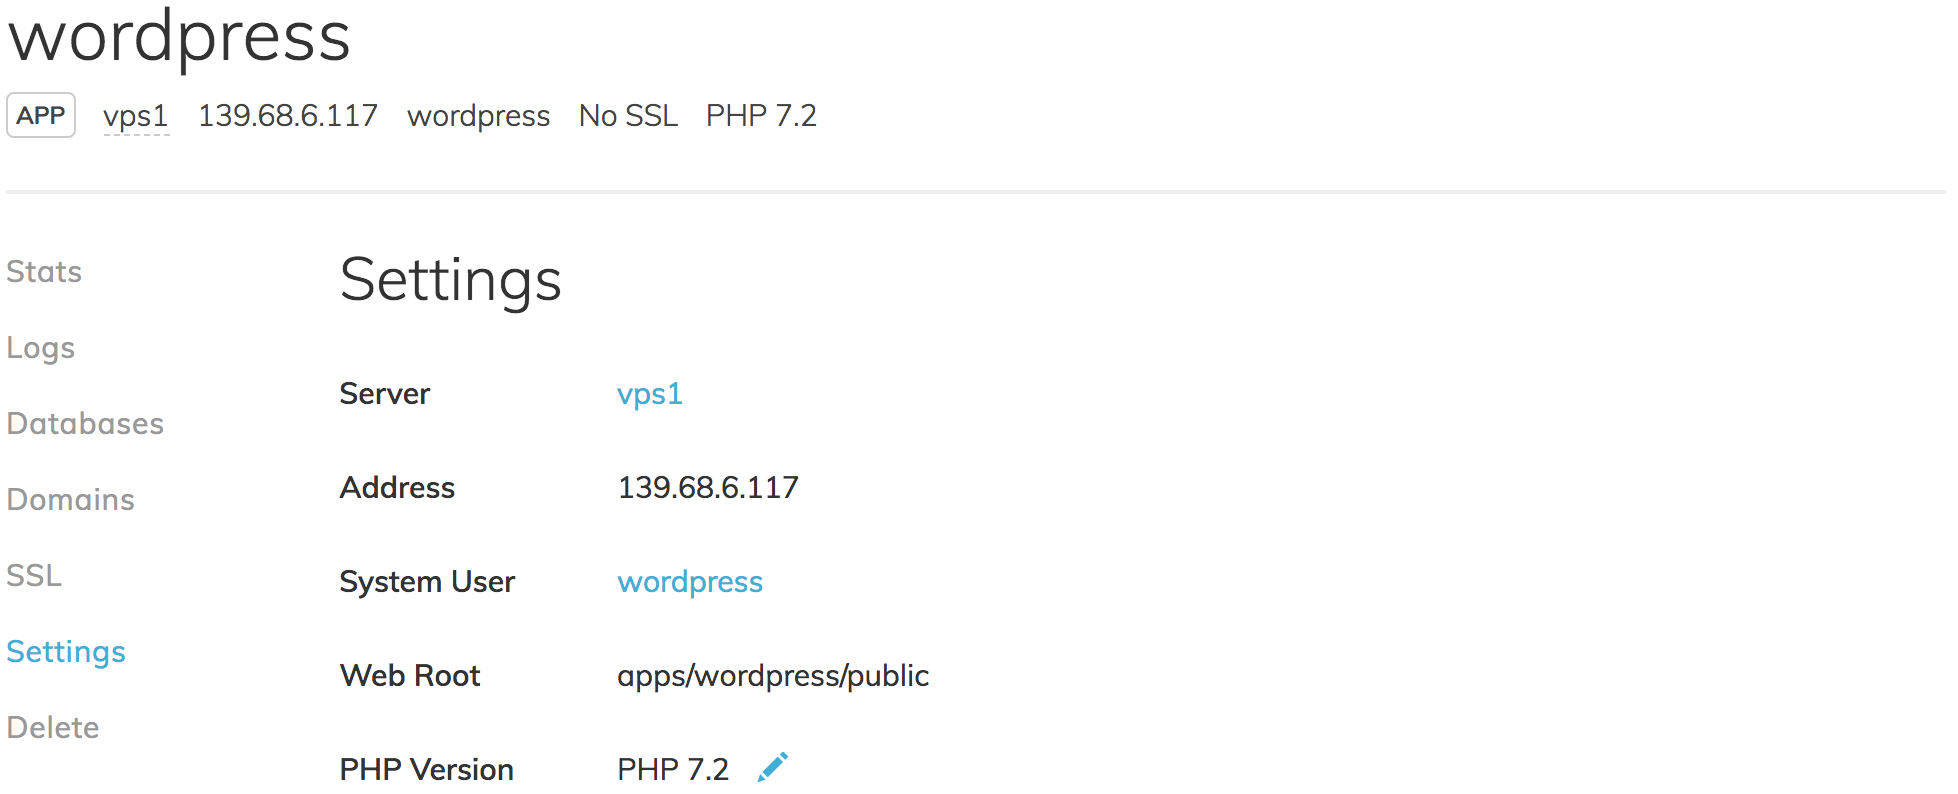
Log in to your server through Cyberduck (or your preferred SFTP client) with the system user the app belongs to. (If you followed our tutorials on uploading files and configuring Cyberduck, then your server may already be displayed under Cyberduck's History tab, and you can double-click it.)
Follow this path to your app directory, where APPNAME is the name of your app (we use wordpress in this tutorial):
apps/APPNAME
Drag the WordPress .zip file from your computer's Downloads folder and drop it into your app directory in Cyberduck.
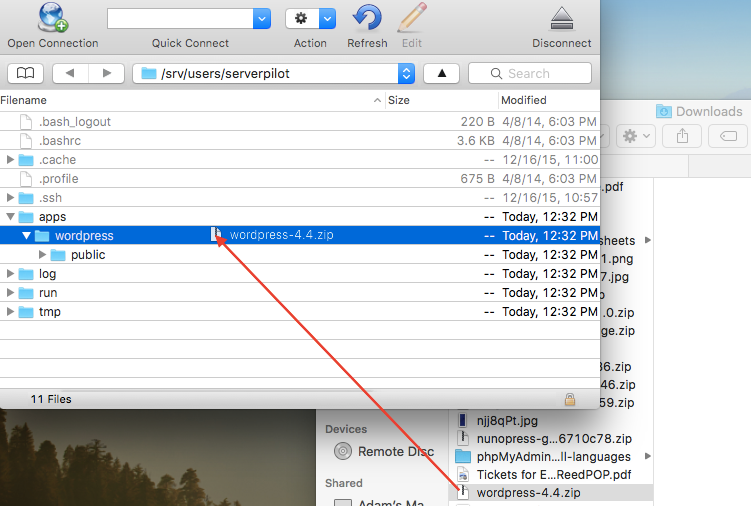
Next, delete the public folder that currently resides in your app directory.
Then, click once on the WordPress .zip file and select Expand Archive from the Cyberduck File menu.
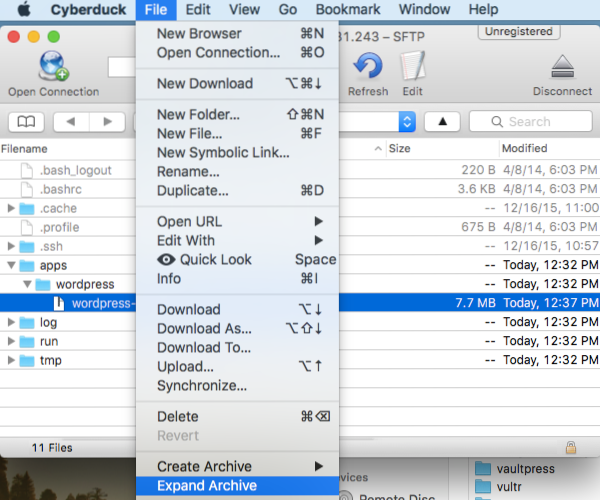
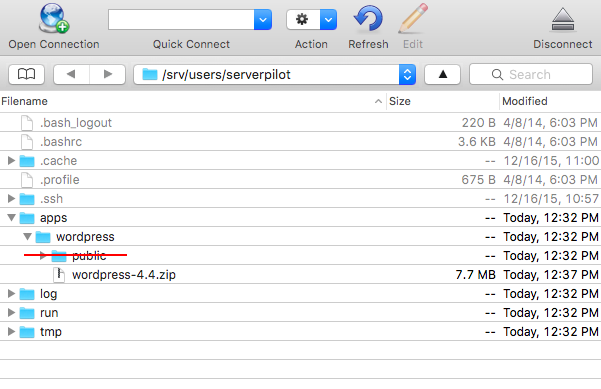
When the file has decompressed, delete the .zip file and rename the new wordpress folder to public.

You should now be able to bring up your server's IP address or your domain (if you have configured DNS) in your browser and see the WordPress installer.
Proceed with the WordPress installation until you are asked database information.
Creating a Database
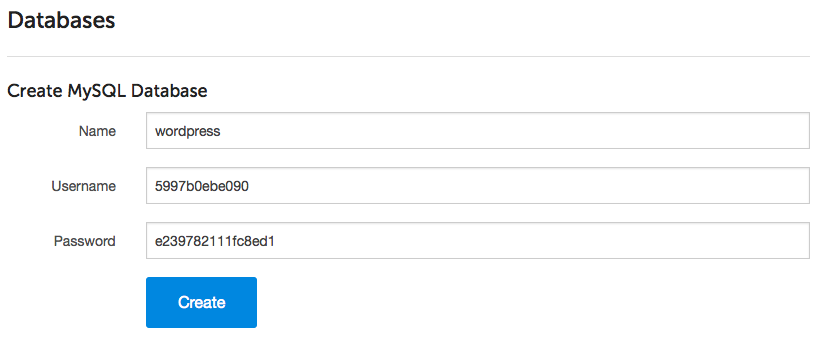
The WordPress Installer will ask you for a database name and database user. Let's create those now.
Open your app in ServerPilot and go to the Databases tab. Click Create Database.
Choose a database name. A database username and password will be generated for you. Copy these into the WordPress Installer and then submit the form in ServerPilot to create the database. If you forgot to copy the database password into the WordPress Installer and need to reset it, just click on the database user in ServerPilot to see the change password form.
Finish the Installer
Finally, answer the rest of the questions in the installer. When finished, you'll be able to log in to your brand new, blazingly fast WordPress Dashboard.
That's It
ServerPilot will keep your server's system packages updated with security updates. ServerPilot also configured a firewall on your server so you don't have to worry about that.
We've taken the pain out of server management so you can focus on your apps.
Happy developing!