How to Configure DNS on Vultr
If you have a server on Vultr, you can now configure the DNS for your domains through Vultr's dashboard.
Create Your A Records
First, sign in to your Vultr account and click DNS on the Servers page.
Then, click Add Domain.
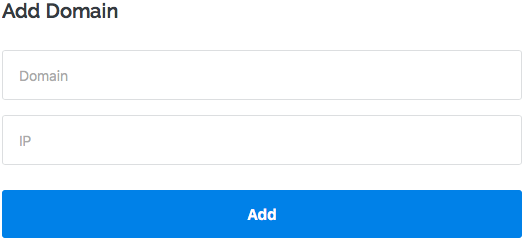
Enter your domain and IP address in the appropriate fields, and then click Add.
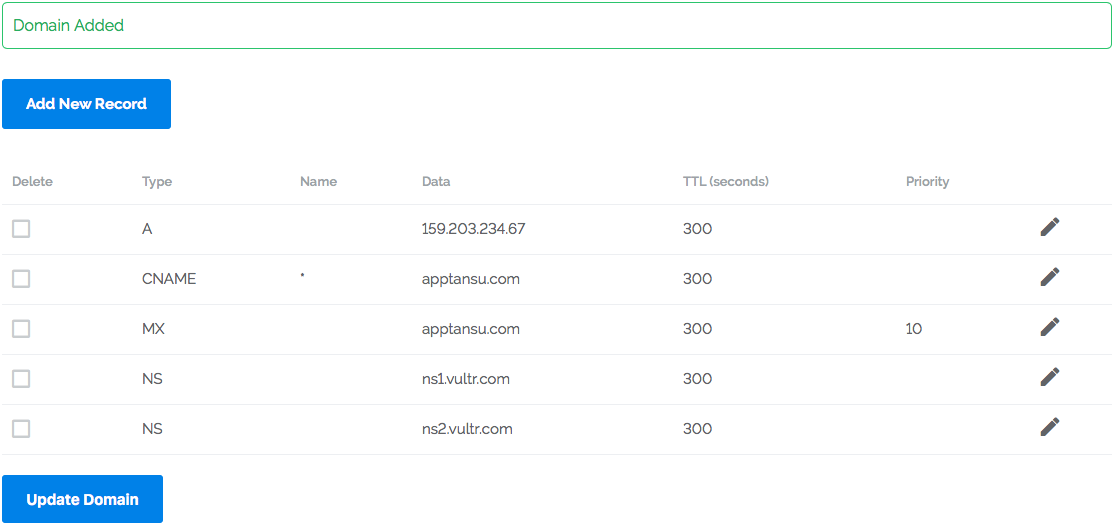
A list of records will appear on your DNS page.
Now, you will need to add more records for www. and any other subdomains.
Click Add New Record.
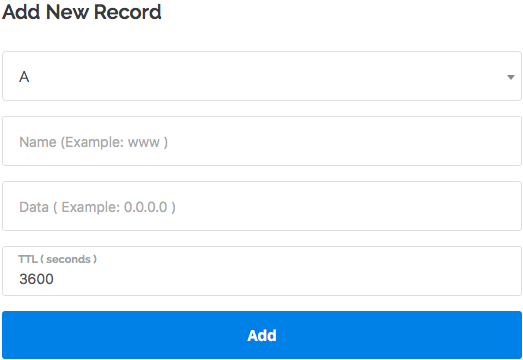
In this form, select A from the drop-down list and enter www (without the dot [.]) in the Name field and your IP address in the Data field.
Click Add.
Repeat this step for each of your subdomains.
Create Your MX Records
You can also set up your mail exchange, or MX, records on Vultr.
Since ServerPilot does not support configuring your server to receive mail, you'll need to first remove the default MX record.
Return to the DNS screen.
Place a check mark in the box next to the existing MX record and click Update Domain.
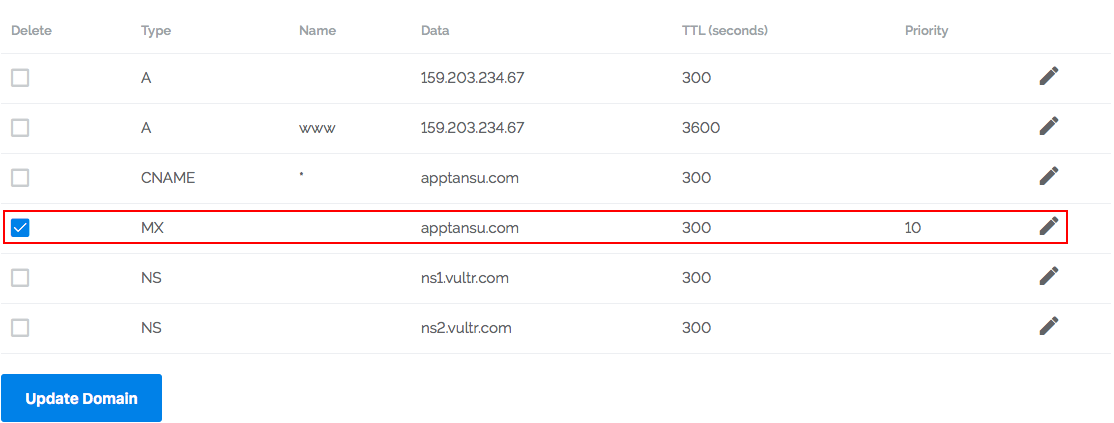
This will delete the default MX record.
Now, click Add New Record.
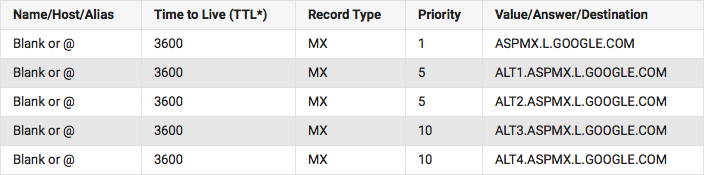
Here you will manually enter your mail host's MX records to complete the form.
We'll use the first MX record value from Google Apps to show you how.
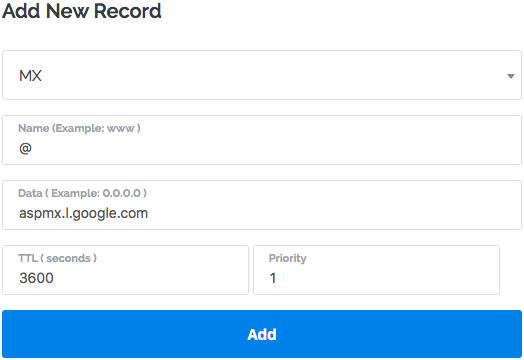
First, select MX from the drop-down list on the Add New Record form.
Then, enter @ in the Name field.
Enter the value/answer/destination provided by Google in the Data field; in this case, aspmx.i.google.com.
Finally, enter the TTL and Priority; click Add.
Repeat this process for each of your mail host's MX records.
That's It!
You've set up DNS on Vultr. Be sure to give your domain registrar the NS records provided by Vultr and to add your domains to your app in ServerPilot.